How to Air Up a Road Bike Tire: Easy Step-by-Step Guide
Keeping your road bike tires properly inflated is key to a smooth and efficient ride. Whether you’re gearing up for a long trip or just a quick spin, knowing how to air up your tires ensures better performance and prevents flats.
You don’t need fancy tools or a mechanic’s expertise to get it right. With a few simple steps and the right pump, you can quickly boost your tire pressure and hit the road confidently. This guide will walk you through everything you need to know to keep your road bike tire perfectly inflated every time.
Understanding Road Bike Tires
Knowing your road bike tires helps you inflate them correctly and maintain peak performance. Tires vary in type and pressure requirements.
Types of Road Bike Tires
You encounter mainly two types of road bike tires: clincher and tubular. Clinchers use an inner tube, making them easier to inflate and repair. Tubular tires have the tube sewn inside the tire casing; these require gluing to the rim and demand different inflation methods. Clincher tires come in various widths, typically ranging from 23mm to 28mm, affecting comfort and rolling resistance.
Importance of Proper Tire Pressure
You maximize speed and minimize flat risk by inflating tires to the correct pressure. Lower pressure increases comfort and traction but raises the risk of pinch flats. Higher pressure reduces rolling resistance but makes for a harsher ride and increases puncture chance on rough surfaces. Check tire sidewalls for pressure ranges, usually between 80 to 130 PSI, and adjust based on rider weight and road conditions.
Tools Needed to Air Up a Road Bike Tire
Proper tools make inflating your road bike tires efficient and accurate. Focus on selecting equipment that matches your tire type and pressure requirements.
Choosing the Right Pump
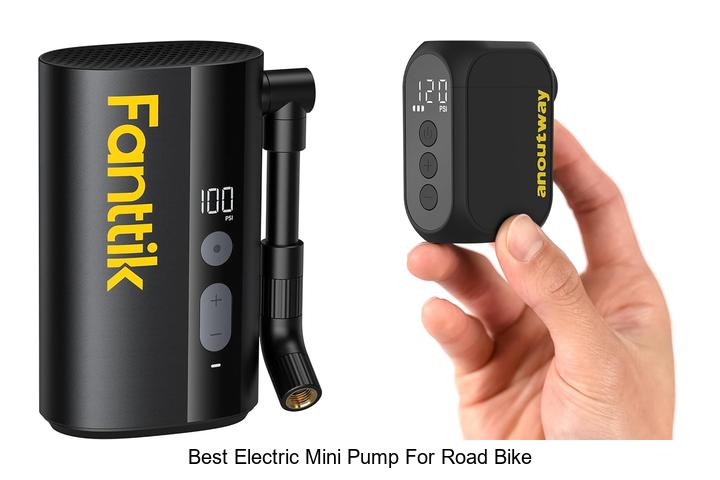
Select a pump compatible with your valve type, either Presta or Schrader. Use a floor pump with a pressure gauge for precise inflation within the 80 to 130 PSI range. Opt for a pump with a secure head and a reliable seal to prevent air leakage during pumping. Compact hand pumps work well for emergency inflation but may lack the pressure accuracy of floor pumps.
Additional Accessories
Use a pressure gauge if your pump lacks one to verify tire pressure. Carry replacement valve adapters for cross-compatibility. Consider valve extenders for deep-section rims requiring easier access. A tire lever set assists with tire removal and installation when necessary. Include a patch kit or spare tube for quick repairs along your route.
Step-by-Step Guide: How to Air Up a Road Bike Tire
Follow these clear steps to inflate your road bike tire efficiently. Proper inflation ensures a smooth ride and reduces the risk of flats.
Preparing the Bike and Tire
Position your bike on a stable surface to prevent tipping. Remove any debris or dirt around the valve to avoid contamination. Inspect the tire for visible damage, cuts, or embedded objects that could cause punctures. Rotate the wheel slowly to confirm the tire sits evenly on the rim.
Checking the Valve Type
Identify your valve type to choose the right pump setting. Clincher tires usually use Presta or Schrader valves. Presta valves are slimmer with a locking nut at the top; Schrader valves resemble car tire valves, wider with a spring-loaded pin. Unscrew the lock nut on Presta valves before inflation. Use valve adapters if your pump head differs from the valve.
Pumping Up the Tire Correctly
Attach the pump head securely onto the valve stem to prevent air leaks. If using a Presta valve, press and hold the valve tip briefly to release trapped air before pumping. Inflate the tire by steadily pumping and watch the pressure gauge closely. Stop periodically to avoid overinflation, which can cause tire damage or blowouts. Maintain smooth, firm strokes for consistent pressure buildup.
Checking the Tire Pressure
Consult the tire sidewall for the recommended pressure range, typically between 80 and 130 PSI. Use a reliable pressure gauge to verify the tire pressure after pumping. Adjust by adding or releasing air to stay within the optimal range. Keep in mind that higher pressures suit smooth roads, while slightly lower pressures improve comfort on rough surfaces.
Tips for Maintaining Proper Tire Pressure
Maintaining correct tire pressure ensures your road bike performs efficiently and reduces the risk of flats. Use these tips to keep your tires properly inflated and extend their lifespan.
When to Check Tire Pressure
Check tire pressure before every ride to guarantee optimal performance. Measure pressure when tires are cold, as heat from riding increases pressure temporarily. Inspect pressure weekly if you don’t ride regularly, since tires naturally lose air over time. Adjust pressure according to riding conditions, lowering it slightly for rough roads to improve comfort and traction.
Common Mistakes to Avoid
Avoid pumping tires without checking the valve type, as incorrect pump heads can damage valves or cause air leaks. Refrain from overinflating tires beyond the recommended PSI on the sidewall, which risks blowouts and reduced traction. Don’t rely solely on the pump gauge; cross-check with a handheld pressure gauge for accuracy. Avoid neglecting slow leaks by regularly inspecting tires for damage or punctures, preventing sudden flats during rides.
Conclusion
Keeping your road bike tires properly inflated is key to a smooth and safe ride. With the right tools and a little know-how, you can easily maintain the ideal pressure that suits your riding style and conditions.
By regularly checking and adjusting your tire pressure, you’ll not only boost performance but also reduce the chances of flats and tire damage. Make it a habit to inspect your tires before every ride, and you’ll enjoy a more reliable and enjoyable cycling experience every time you hit the road.
Frequently Asked Questions
Why is it important to keep road bike tires properly inflated?
Proper inflation ensures optimal bike performance, improves speed, and reduces the risk of flats by providing the right balance between comfort and grip on the road.
Do I need special tools to inflate my road bike tires?
No, you only need a compatible bike pump, preferably a floor pump with a pressure gauge, that fits your tire valve type (Presta or Schrader).
What is the difference between clincher and tubular tires?
Clincher tires use inner tubes and are easier to inflate and repair. Tubular tires are glued to the rim and require different inflation and repair methods.
How do I know the correct tire pressure for my road bike tires?
Check the tire sidewall for the recommended pressure range, usually between 80 to 130 PSI, and adjust based on rider weight and road conditions.
What type of pump should I use for my road bike tires?
Use a pump compatible with your valve type (Presta or Schrader). A floor pump with a built-in pressure gauge is best for accuracy and ease of use.
How can I identify my tire’s valve type?
Presta valves are narrow with a lock nut at the top, while Schrader valves look like car tire valves and are wider with a spring inside.
How often should I check my tire pressure?
Check before every ride when possible, or at least weekly if you ride less frequently, to maintain safe and optimal tire pressure.
What common mistakes should I avoid when inflating bike tires?
Avoid using the wrong pump for your valve, overinflating, relying only on the pump gauge, and neglecting slow leaks or tire damage.
Can I inflate my tubular tires the same way as clincher tires?
No, tubular tires require special care since they are glued to the rim, so inflating and repairing them differs from clincher tires.
What additional tools should I carry for tire maintenance on the road?
Carry tire levers, a patch kit or spare tube, valve adapters, and a tire pressure gauge for quick repairs and maintenance during rides.


